The One System

Training Guide
Step 1: Unboxing and initial setup
What's in the box?
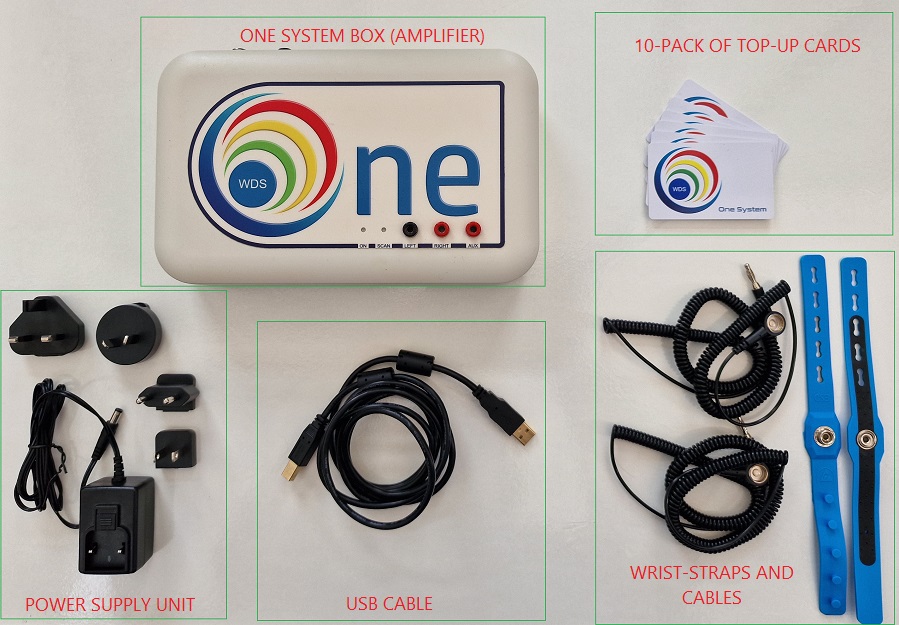
When you open the box, you'll find the following items:
- The ONE box (also referred to as the amplifier)
- A USB cable for connecting the ONE box to your computer
- A power adapter (for plugging into a wall socket)
- A pack of top-up cards
- A pair of wrist straps and connecting cables
Getting to know the ONE box
The ONE box features several lights and cable sockets. Let’s take a look at what each one does. Below is a top view of the box, with green letters used as reference points:

A (light)
When a power supply is connected, this light glows red. No light means no power!
B (light)
Same as A—this light glows red when power is active.
C (socket)
Connect one of the wrist straps here. This cable should be attached to the client’s left wrist.
D (socket)
As with C, but this socket connects to the client’s right wrist.
E (socket)
This socket is reserved for future use. No need to worry about it for now.
The rear of the box
On the rear panel, you'll find additional connectors and indicator lights:
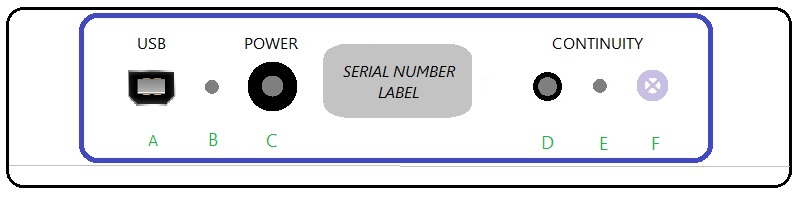
A (socket)
Plug in the USB cable here. The other end connects to your computer.
B (light)
This light glows when the ONE box successfully connects to Windows.
C (socket)
Connect the power lead here. See below for assembly instructions.
D (socket), E (light), F (grounding peg)
These components are reserved for future functionality.
Assembling the power supply
Inside the power supply bag, you'll find a cable with a connector at one end and a docking plate at the other. You'll also see several pin adaptors—choose the one that matches your local power socket. To connect it, hold the adaptor at an angle to the docking plate, as shown in the photo below.
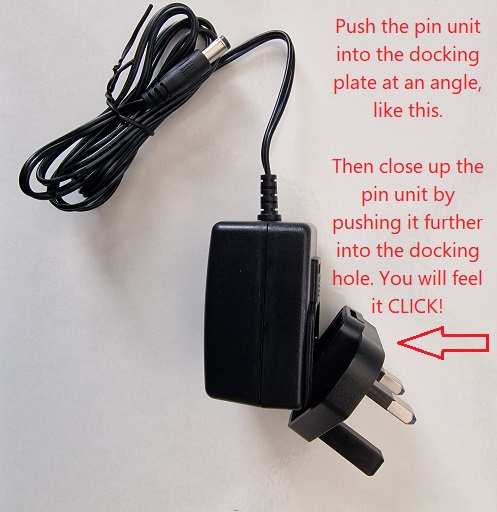
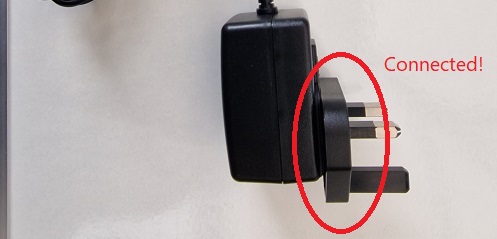
Once assembled, give the pin adaptor a gentle tug to ensure it has clicked securely into place.
The big picture
After assembling the power supply with the correct regional pin adaptor, you're ready to connect everything:
- Plug the power lead into the ONE box, connect the pins to your wall socket, and switch on the power. The ON light on the top of the box should glow red. Note: We strongly recommend using a surge protector. A power surge may damage the ONE box. If repair is needed, it will be handled by our technical team in England.
- Connect the USB cable to the ONE box and to a compatible USB port on your PC. Note: If your PC lacks a matching socket, you may need a "USB Type B to USB Type C" cable, available from most computer stores.

If you're following the 7-step guide, continue to Step 2: Installing the ONE software